Stream Recording
Record your gameplay sessions locally (H.264/HEVC/ProRes) or stream live to Twitch, YouTube, or any custom RTMP endpoint — all without leaving the game.
Overview
Record gameplay to a file on your Mac, or stream live to Twitch, YouTube, or any custom RTMP server — all without leaving the game. Encoding uses your Mac hardware, so the speed impact stays small.
What You Get
- Local Recording: Capture to local files in H.264, HEVC, or lossless ProRes 422 / ProRes 4444
- Live Streaming: Stream to Twitch or YouTube (with stream-key check), or any custom RTMP server
- In-Game Controls: Start and stop recording from the game toolbar without breaking flow
- Hardware Encoding: Your Mac encodes video and audio in hardware for minimal slowdown
- Stream Resolutions: Native / 720p / 1080p / 1440p / 4K in the resolution picker. Streaming always uses H.264; pick ProRes for local files only
- Rolling Video Buffer: Tap a "save last moments" hotkey to write the past few seconds to disk — perfect for clip-worthy plays you didn't see coming
- Share Button: Single-press and long-press share actions, configurable per game
- Record With or Without Shaders: Choose whether the recording shows your shader look (CRT, LCD, etc.) or the raw game pixels
- Live Status: The toolbar shows connecting, live, or failed with a plain reason
How to Use
Local Recording
-
Open Stream Settings
Go to Settings → Streaming & Media. Under the Local tab, pick encoder (H.264 / HEVC / ProRes), bitrate, and quality presets.
-
Start Recording from the Game
Launch any game. Click the record button on the in-game overlay toolbar to start. A red indicator confirms recording in progress.
-
Save Last Moments
Press the "Save Last Moments" hotkey during gameplay to write the past few seconds to disk. The clip lands in the same folder as your recordings.
-
Stop & Locate
Press the record button again to stop. Use the share button's "Reveal in Finder" option to find your files.
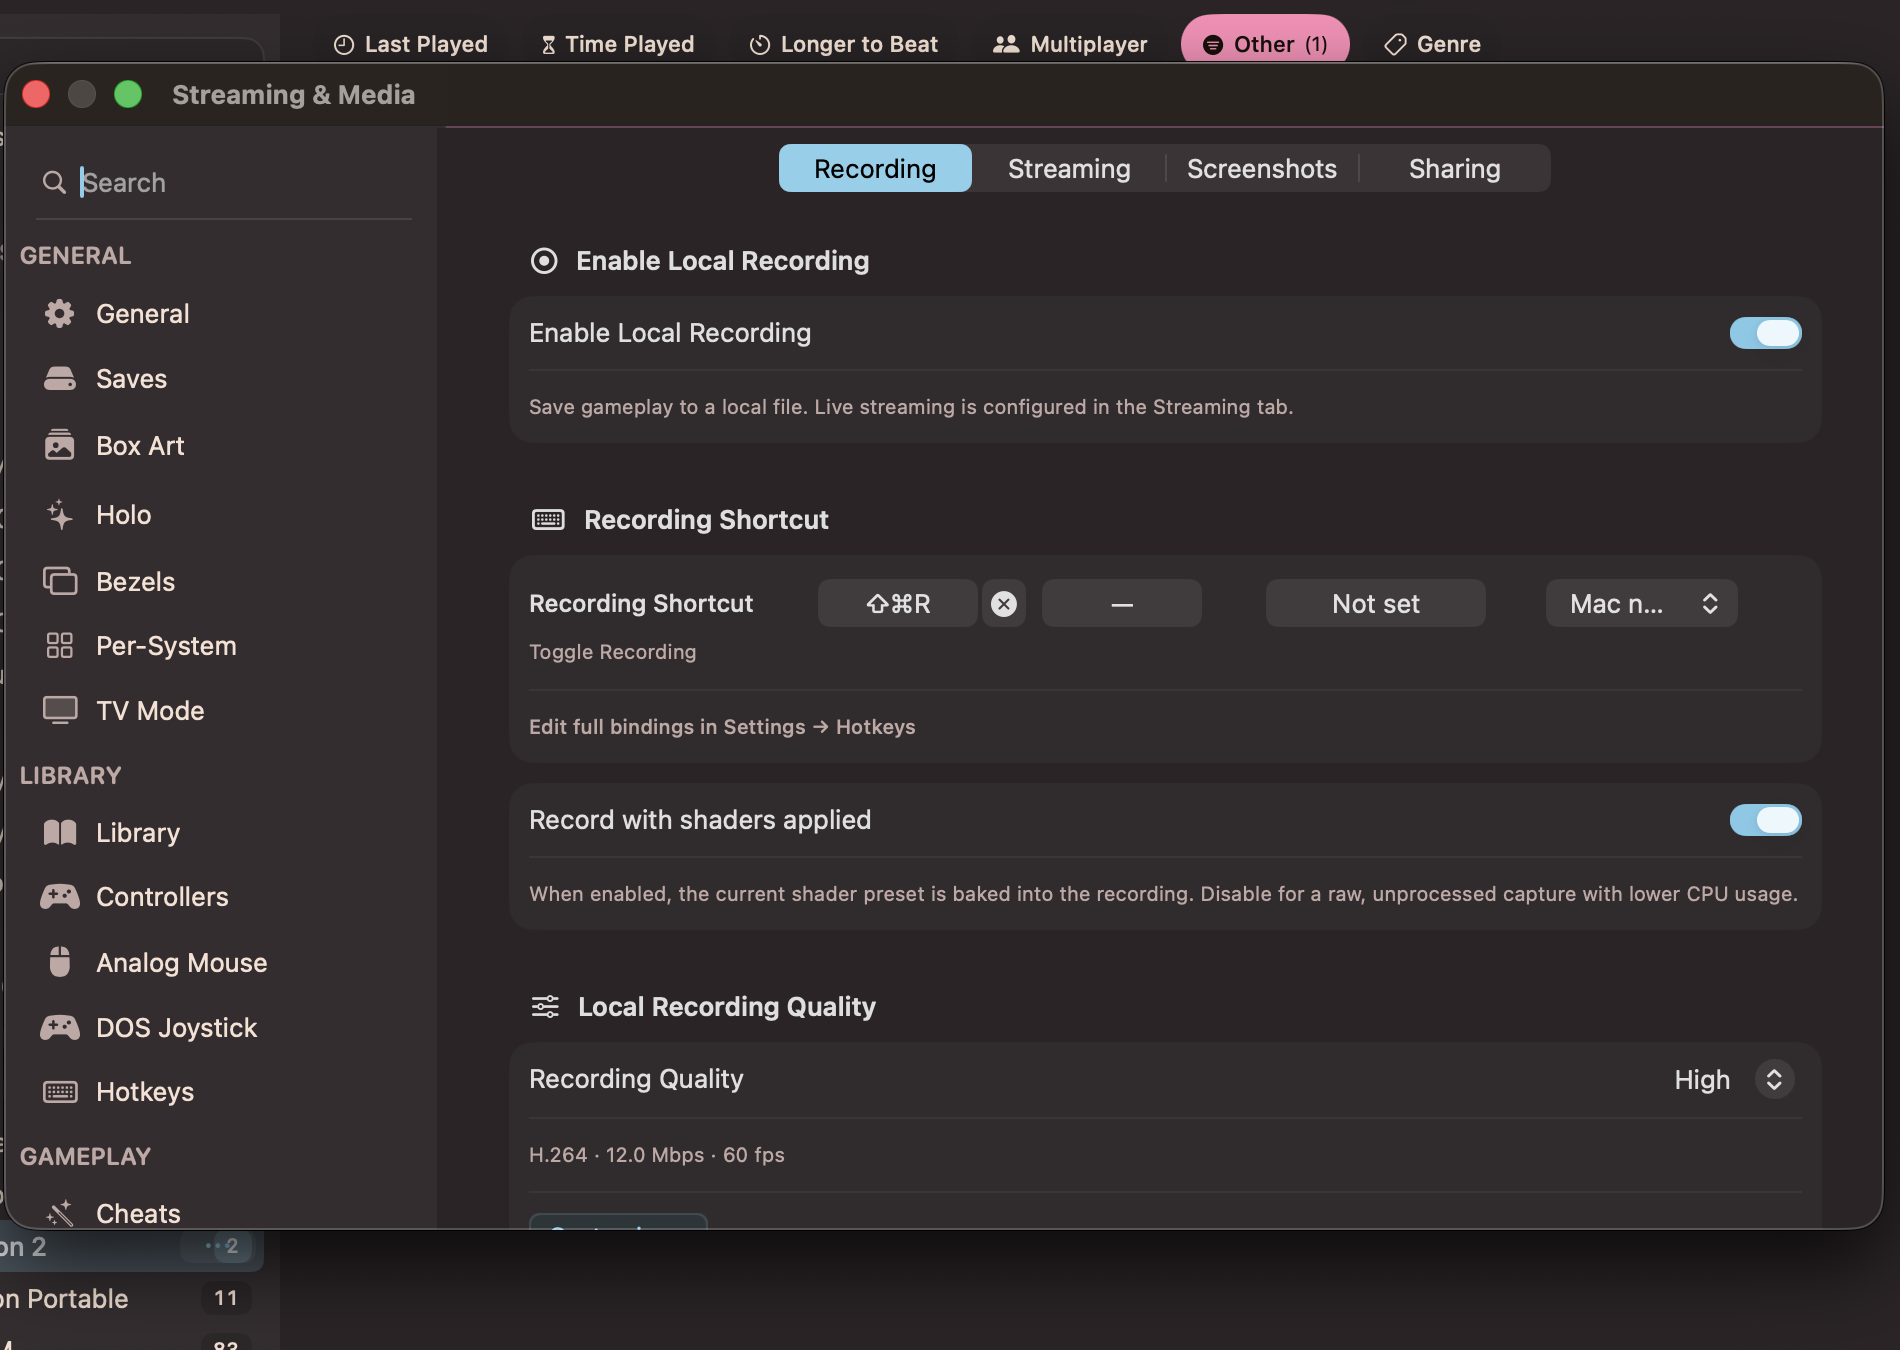
Recording settings: shortcut, record-with-shaders toggle, and quality presets
Live Streaming to Twitch or YouTube
-
Open the Twitch or YouTube Tab
Go to Settings → Streaming & Media and pick the Twitch or YouTube tab.
-
Enter Your Stream Key
Copy your key from your Twitch dashboard or YouTube Studio, paste it, and hit Verify. You get a pass or fail message at once.
-
Configure Resolution & Encoder
Select Native / 720p / 1080p / 1440p / 4K from the resolution picker. Higher resolutions use more CPU. (ProRes is a local-recording choice, set under the Local tab.)
-
Start Streaming from the Game
Open any game. The game toolbar shows the streaming button; click it to begin. The status reads connecting, then live. Errors show in plain words.
-
Stop Streaming
Click the streaming button again or close the game. The stream stops cleanly.
Custom RTMP
-
Open the Custom Tab
Under Settings → Streaming & Media, open the Custom tab and enter your RTMP URL (with stream key appended as needed).
-
Click Verify
TruchiEmu checks the server and reports pass or fail before you go live.