Shader System
Shaders change how your game looks on screen—add a warm CRT glow, turn pixels into a Game Boy LCD grid, or clean everything up with a sharp upscale. Pick a preset and it just works.
Overview
TruchiEmu comes with two kinds of shaders:
- Built-in presets — 17 ready-to-use effects for CRT, handheld LCD, smoothing, and composite video. No downloads, no setup.
- Slang/RetroArch presets — hundreds of community-made presets from the libretro slang-shaders project. Curated picks show up in the "All" tab; everything discovered appears in the "Slang" tab.
Everything runs fast on any modern Mac. Pick a preset and play.
What's in the Library
- 17 Built-in Presets — CRT Lottes, CRT Classic, CRT Pittman, Lite CRT, CRT Multipass, Sharp Bilinear, Smooth Upscale, 8b Game Boy, 8b Game Boy Color, GBA, PSP, NDS, 3DS, Dot Matrix LCD, Famicom RF, RF Decoder, and No Shader (passthrough). Covers CRT, handheld, smoothing, and composite looks.
- Hundreds of Slang/RetroArch Presets — CRT, NTSC, cel shading, anti-aliasing, procedural, bezels, and more. A curated selection appears in the All category tab; every discovered preset is in the Slang tab. Drop new
.slangpfiles into~/Library/Application Support/TruchiEmu/SlangPresets/and they appear automatically. - Your Own Presets — Save any tweaked settings as a
.truchishaderfile you can export, share, and re-import. They show up in the Saved tab. - Per-Game Shaders — Give a specific game its own shader from its detail page, or apply one to every game on the same system.
Custom Presets (.truchishader)
Once you've dialed in the look, you can save it as a custom preset and take it anywhere.
- Save — Click Save in the shader editor after tweaking parameters. Give it a name and it appears in the Saved tab.
- Export — Right-click any saved preset and choose Export to get a
.truchishaderfile you can share or keep as a backup. - Import — Click Import in the shader editor and pick a
.truchishaderfile someone sent you. It gets a fresh ID so there's no conflict with existing presets. - Location — Files live in
~/Library/Application Support/TruchiEmu/Shaders/if you need to find or remove them manually.
Step-by-Step Guide
Pick a Shader
-
Open the Shader Editor
Click the shader icon in the game window toolbar, or go to
Settings → Video → Shaders. The editor opens as a floating panel you can leave open while you play. -
Pick a Preset
Browse by category tab:
- All — Curated mix of built-in and the best Slang presets
- CRT — CRT Lottes, Classic, Lite, Multipass, plus Slang CRT presets
- LCD — Game Boy through 3DS, plus Slang handheld presets
- Smoothing — Sharp Bilinear, Smooth Upscale
- Composite — Composite video effects
- Slang — Every discovered
.slangppreset - Saved — Your custom
.truchishaderpresets
-
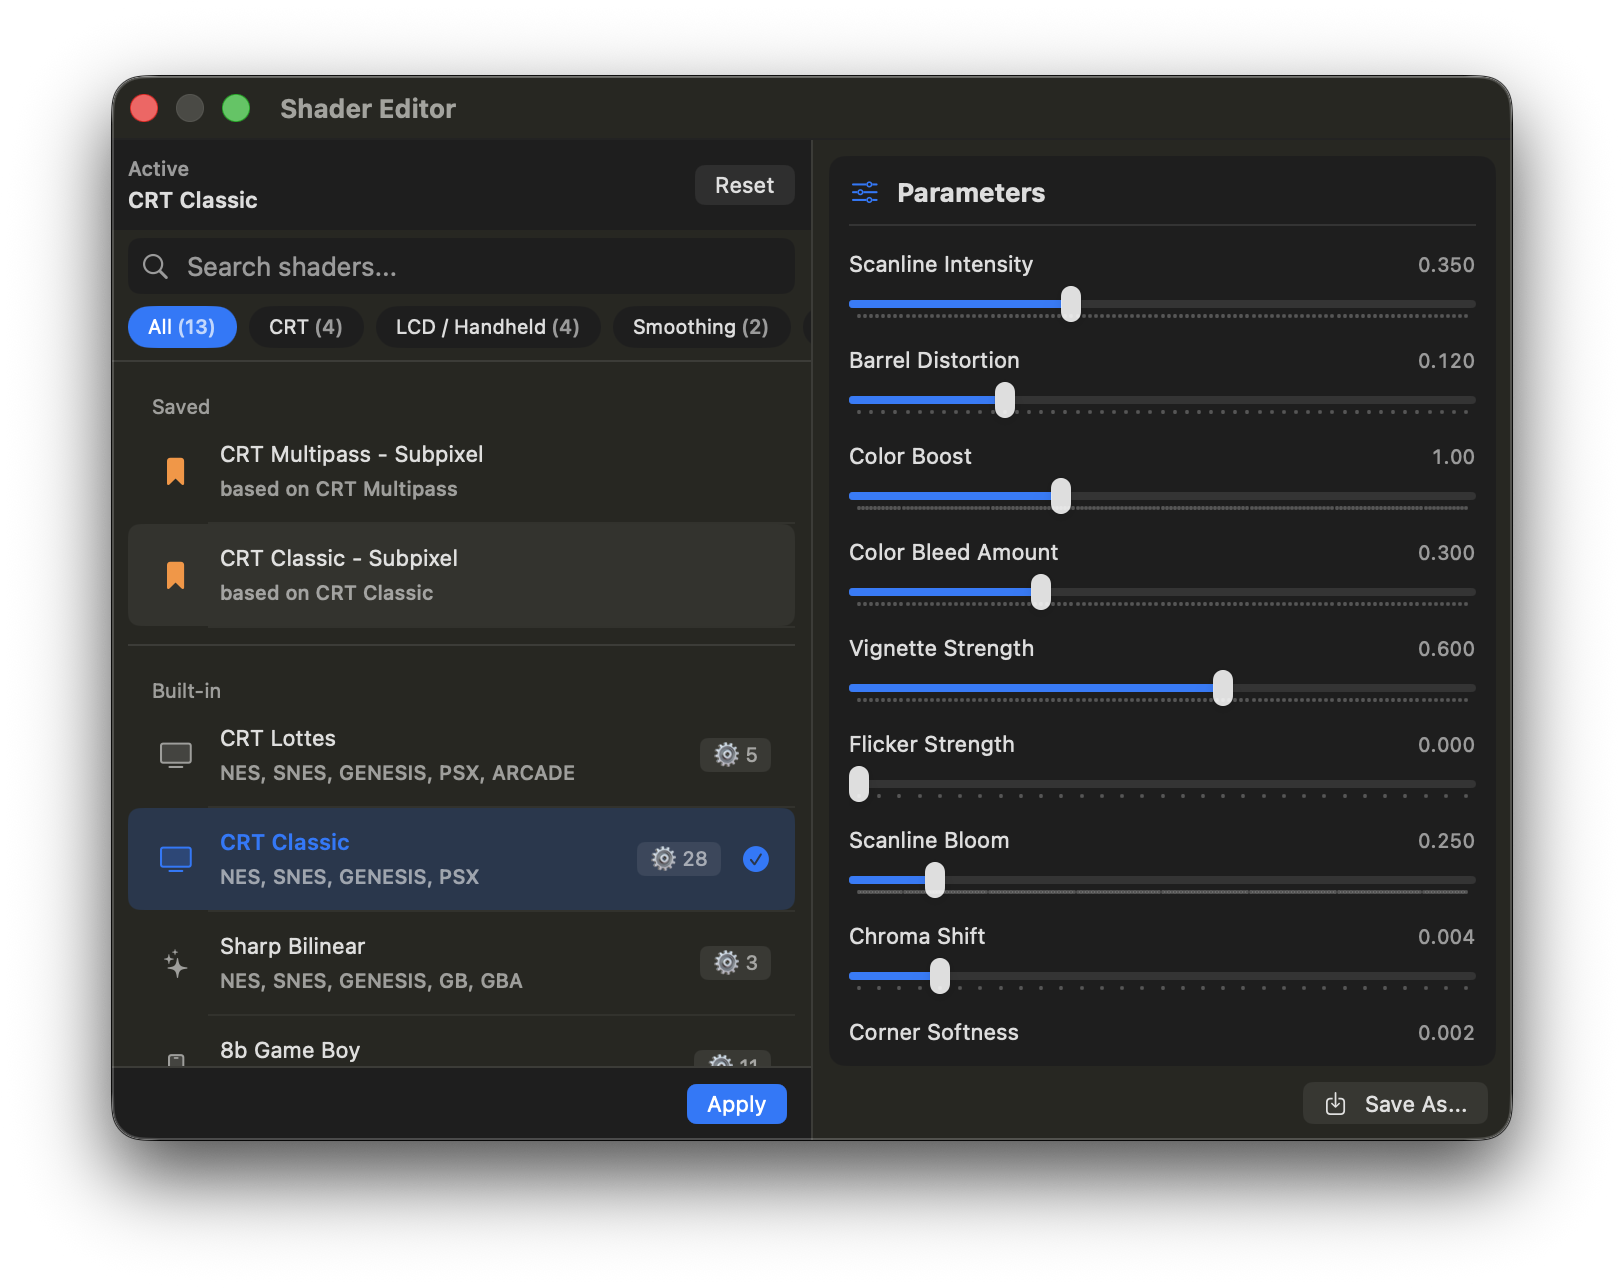
Tweak the Look
Every preset comes with sliders, toggles, and dropdowns—scanlines, curvature, color boost, glow, and more. Move a slider and you see the change immediately. No restarting needed.
Live Shader Edit
-
Launch with Live Editing
On any game's detail page, click Live Shader Edit. The game launches and the shader editor opens next to it.
-
Tweak as You Play
Adjust sliders or switch presets—the game updates in real time. Compare looks without closing anything.
-
Done? It Saves
Close the editor and your settings are saved as the default for that game. Next time you launch, it remembers.
Per-Game and Per-System Shaders
-
Give a Game Its Own Shader
Open any game's detail page. The Shader section shows what's active. Click Customize to pick a different preset or adjust parameters—those settings stick to that game only.
-
Apply to All Games on the Same System
Click Apply to All Games to set a shader as the default for every ROM on that system. Games that already have their own custom shader are left alone.
-
Undo a Per-Game Setting
Click Use Default to clear a game's custom shader. It goes back to whatever the system default is.
CRT Pittman and 3D Cabinet
CRT Pittman simulates a CRT with faux-NTSC composite, phosphor persistence, shadow mask, and bloom. A 3D cabinet frame with fitted camera and TV toggle is available for a cabinet look.
- Enable: Shader picker → CRT category → CRT Pittman
- Tune: adjust pixel ratio, cabinet reflection, and bloom in the shader editor; changes apply live
- Cabinet: enable the 3D cabinet for a framed view, or keep the flat full-frame view
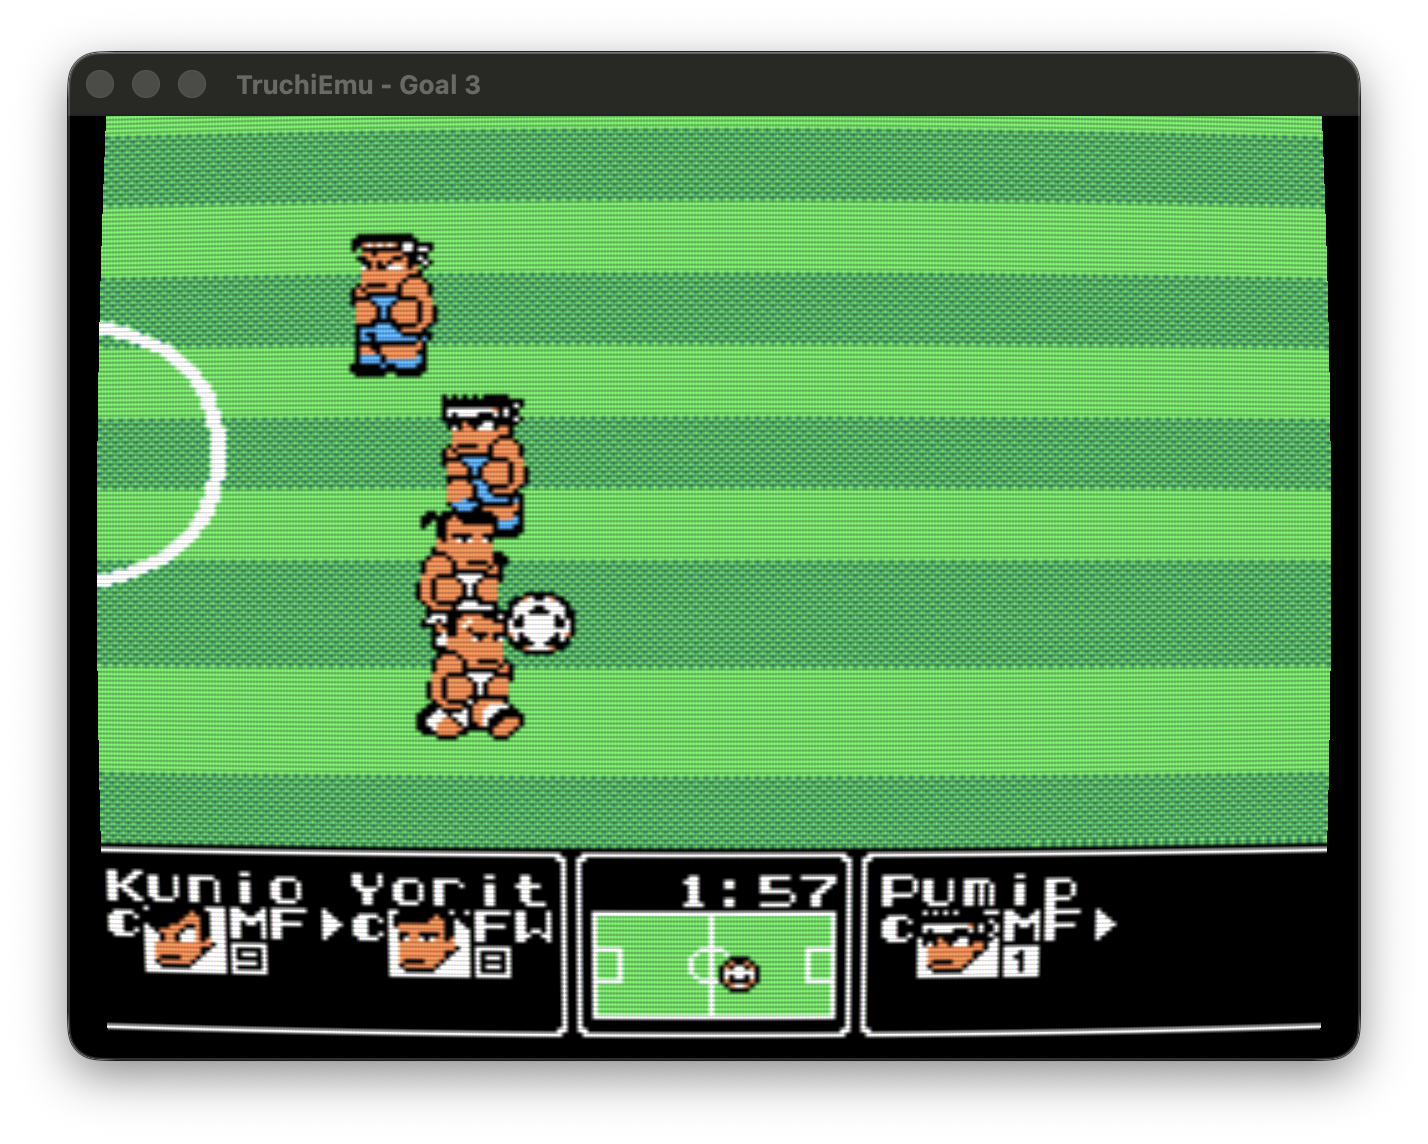
CRT glow: pick a preset in the CRT category and tune it live